
When you enable DKIM for your domain, you’re asked to configure something called a DKIM selector. It may seem like a small setting, but it plays an important role in how email authentication works. Without the correct selector, receiving mail servers cannot find the public key needed to verify your emails, which can lead to DKIM failures.
If your organization sends emails from multiple platforms, rotates DKIM keys, or manages several email streams, understanding DKIM selectors becomes even more important. In this guide, you’ll learn what a DKIM selector is, how it works, why organizations use multiple selectors, how to find and configure one, common issues you may face, and the best practices for managing DKIM selectors effectively.
What is a DKIM Selector
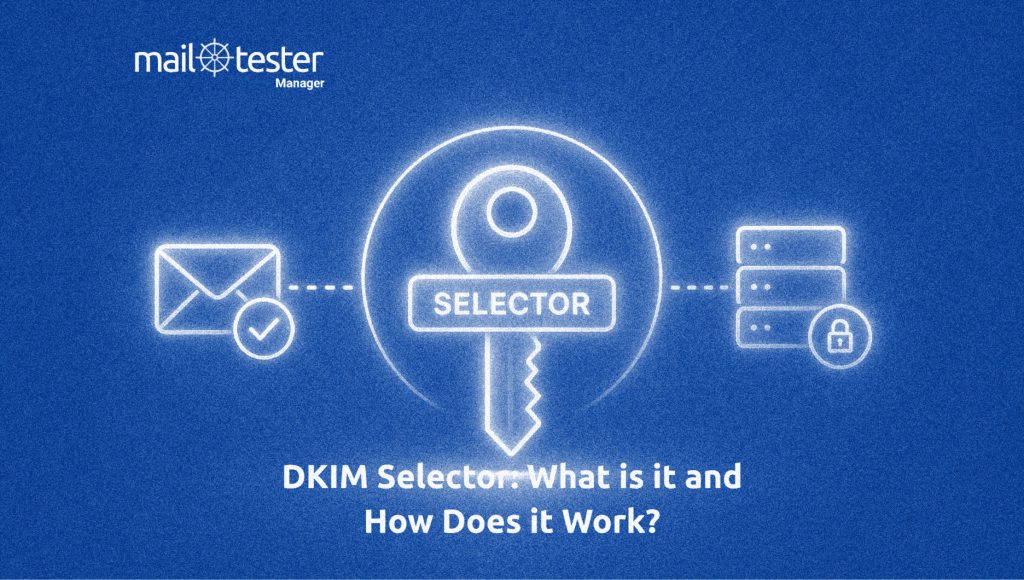
A DKIM selector is a unique identifier that tells the receiving mail server which DKIM public key to use when verifying an email. It appears in the s= tag of the DKIM-Signature header and points to the correct DKIM record stored in your domain’s DNS.
Think of it as a label for your DKIM key. If your organization uses multiple DKIM keys, the selector helps the receiving server choose the right one for authentication. For example, your marketing platform might use the selector mkt, while your customer support system uses support. This allows both services to send authenticated emails from the same domain without sharing the same DKIM key.
The selector works together with the d= tag. While the d= tag identifies the signing domain, the s= tag identifies the specific DKIM key for that domain. The receiving server combines both values to locate the correct DNS record and verify that the email is genuine and has not been modified in transit.
How Does a DKIM Selector Work?
Now that you know what a DKIM selector is, let’s see how it works when an email is sent.
- The sending server signs the email: Before the email is sent, the mail server creates a DKIM signature using a private key. This signature is added to the email header.
- The DKIM selector is added: The email header also includes the s= tag, which contains the DKIM selector. This tells the receiving server which public key it should look for.
- The receiving server looks up the public key: The receiving server combines the selector with the sending domain (from the d= tag) to find the correct DKIM record in DNS.
- The email is verified: The server retrieves the public key from the DNS record and checks the DKIM signature. If the signature matches, the email passes DKIM authentication. This confirms that the email was sent by the claimed domain and was not changed while it was being delivered.
Why Do Domains Use Multiple DKIM Selectors?
Most organizations do not use just one DKIM selector. Instead, they create multiple DKIM selectors so different email services or teams can use their own DKIM keys. This makes email authentication easier to manage and more secure. Many organizations send emails from more than one platform. For example, they may use one service for newsletters, another for customer support, and a third for billing emails.
Instead of using the same DKIM key everywhere, each service can have its own DKIM selector. For example:
- marketing for email campaigns
- support for help desk emails
- billing for invoices and payment notifications
This makes it easier to identify which service signed an email and manage each one separately.
Also, multiple DKIM selectors make key rotation easier. With multiple DKIM selectors, you can create a new selector with a new key while keeping the old one active for a short time. New emails are signed with the new key, while older emails can still be verified using the old key. Once the old key is no longer needed, its DNS record can be removed.
How to Use a DKIM Selector
Using a DKIM selector is simple. Follow these steps:
Create a DKIM Key Pair
Generate a private key and a public key. The private key is used to sign your outgoing emails, while the public key is added to your domain’s DNS records.
Choose a DKIM Selector
Pick a simple and meaningful name for your selector. This name helps identify which DKIM key was used to sign the email.
Add the Public Key to your DNS
Create a new TXT record in your DNS using this format: selector._domainkey.yourdomain.com
Replace selector with the name you chose, and add your public key as the record value.
Update Your Email Service
Configure your email server or email provider to use the same DKIM selector when signing outgoing emails. Once it’s set up, every email sent through that service will use the correct DKIM key for authentication.
How to Find a DKIM Selector
If you want to check your DKIM configuration or troubleshoot authentication issues, you may need to know how to find a DKIM selector. There are a few easy ways to do this, depending on whether you’re checking an email or managing the domain.
Check the Email Headers
The easiest way to find a DKIM selector is by looking at the email headers. Open the original message or raw headers in your email client and look for the DKIM-Signature header. You’ll find a field that starts with s=. The value next to it is your DKIM selector. For example, if you see s=google, then google is the selector used to sign that email.
Check Your Email Provider’s Settings
If you manage your domain, you can also find the selector in your email provider’s admin panel. Services like Google Workspace, Microsoft 365, and many email marketing platforms display the DKIM selector when you enable or configure DKIM.
Use a DKIM Lookup Tool
A DKIM lookup tool can also help you find and verify your DKIM record. Simply enter your domain name and DKIM selector to check whether the correct public key is published in DNS and whether the record is working properly. This is a quick way to troubleshoot DKIM-related issues.
If you don’t know the selector, check your email headers or your email provider’s settings first, then use the lookup tool to verify the configuration.
Common DKIM Selector Issues and Best Practices to Avoid Them
Even though DKIM selectors are simple to set up, small mistakes can cause DKIM authentication to fail. The good news is that most selector-related problems are easy to identify and fix once you know what to look for.
The DKIM Selector Doesn’t Match the DNS Record
One of the most common problems is when the selector in the email header is different from the selector published in DNS. For example, the email may use s=marketing, but the DNS record exists under news._domainkey.example.com.
Fix it by checking the s= value in the email header and making sure the same selector exists in your DNS. Also confirm that your email service is configured to use the correct selector.
The DKIM Record Is Missing
The selector may be correct, but there is no DKIM record published for it. When this happens, receiving servers cannot find the public key needed to verify the email. It can be sorted by creating the missing DKIM TXT record in your DNS using the selector provided by your email service. After adding the record, allow some time for DNS changes to propagate.
The Wrong Public Key Is Published
Sometimes the DNS record exists but contains an outdated or incorrect public key. This often happens after a DKIM key rotation or when the record is updated incorrectly. So, compare the public key in your DNS with the one generated by your email provider. If they don’t match, replace the old key with the correct one and verify the record again.
The Selector Was Removed Too Early
During DKIM key rotation, some administrators delete the old selector immediately after creating a new one. However, emails signed with the old key may still be in transit for a short time.
Keep the old selector active until you’re sure no emails are using it anymore. Only remove the old DNS record after the transition is complete.
DNS Changes Have Not Propagated Yet
After adding or updating a DKIM selector, the new DNS record may not be visible immediately because DNS changes take time to spread across the internet. To fix it, wait for DNS propagation to finish before testing the configuration. If the problem continues after several hours, check that the DNS record was entered correctly.
Using the Same Selector Across Multiple Services
Using one selector for every email platform makes troubleshooting more difficult. It also increases the impact if a DKIM key needs to be replaced. So, assign separate DKIM selectors to different email services, such as marketing, support, or transactional emails. This keeps your DKIM setup organized and makes future key rotation much easier.
DKIM Selector: Final Takeaways
A DKIM selector may be a small part of the DKIM authentication process, but it plays an important role in helping receiving servers find the correct public key to verify your emails. Using clear DKIM selectors, publishing the right DNS records, and assigning different selectors to different email services can make your DKIM setup easier to manage and troubleshoot. As your email infrastructure grows, following these best practices will help maintain reliable email authentication, improve deliverability, and strengthen your overall email security strategy.